Miter Cut Rails are horizontal frame components shaped with angled end cuts, usually to create clean, continuous corners. They appear in cabinet doors, picture frames, wall paneling, window trim, and selected furniture designs. Instead of meeting with a square butt joint, each rail ends at a matching angle. The result can look seamless when the cuts are accurate.
Their main purpose is both structural and visual. In a cabinet door, mitered rails connect with matching stiles to form a strong rectangular frame. In decorative trim, they help wrap a corner without exposing an unfinished end grain. Picture frames depend on the same principle, although precision becomes especially noticeable at every corner. A tiny gap can catch the light immediately.
Good results depend on more than a sharp saw. Wood movement, grain direction, measuring technique, and clamping pressure all matter. Experienced woodworkers usually test the setup on scrap material before cutting the finished rails. That small step prevents expensive mistakes. It also reveals whether the blade is truly cutting at the intended angle.
Miter Cut Rails are not automatically the best choice for every project. They can require careful fitting and may be less forgiving than simpler joints. Still, when clean corners and a refined appearance matter, they provide a practical solution. This guide explains where they are used, how they function, and what to check before making the first cut. The process looks simple. It rarely is.
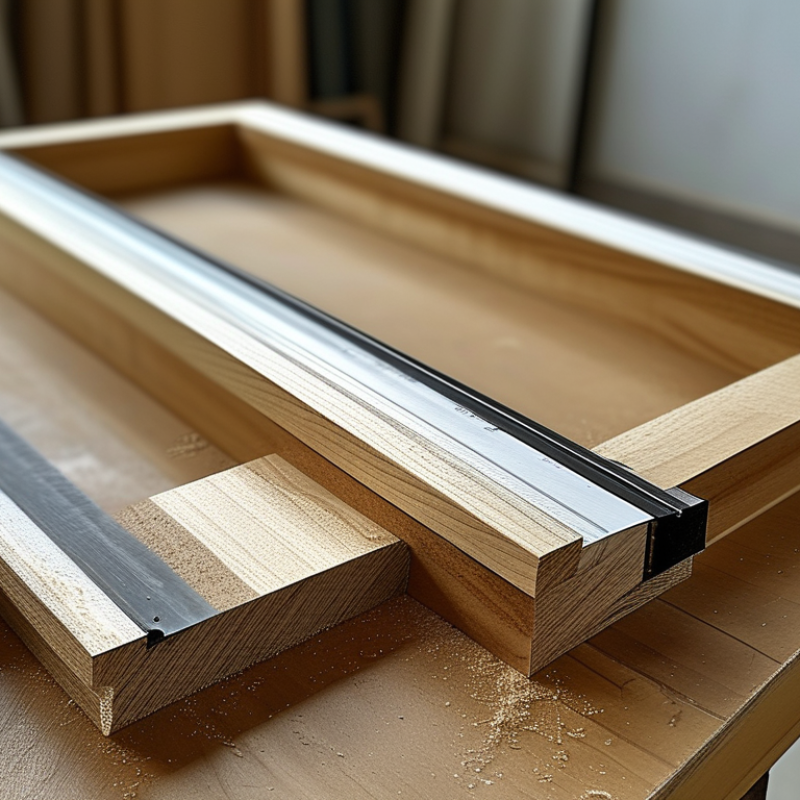
Miter cut rails are horizontal frame components with angled ends, usually cut at 45 degrees. They meet matching stiles or rails to create clean, often square corners. Woodworkers use them in cabinet doors, picture frames, wall paneling, and other framed assemblies. The rail carries part of the frame’s structure, while the miter cut helps hide end grain at the corner.
A miter saw, table saw with a suitable guide, or hand saw can create the angled cut. Two complementary cuts should meet evenly, forming a 90-degree corner. Accurate measuring matters, but the cut direction matters just as much. A small error can leave a visible gap along the face. I usually cut one test piece first, then check it against a scrap corner. This simple step prevents wasted material.
The joint works best when the rail ends are flat, clean, and fully supported during cutting. Apply a thin, even layer of suitable wood adhesive, then use clamps without forcing the corner out of alignment. Pinning or splining may improve strength on larger frames. Miter joints can still open when wood expands or contracts. That weakness is easy to overlook. A careful builder also checks grain direction, rail width, and the finished frame’s diagonal measurements before assembly. Freshly cut edges may look perfect, yet a dry fit often reveals the real problem.

Miter cut rails are used where two rail sections must meet at a clean, angled joint. In cabinetry, they frame doors, drawer fronts, and open shelving. In stair projects, a mitered handrail can turn smoothly around a landing. Picture frames, window seats, and custom furniture also rely on this detail. The joint hides exposed end grain and creates a continuous visual line.
The U.S. Bureau of Labor Statistics reported about 948,200 carpenter jobs in 2023, with employment projected to grow 4% from 2023 to 2033. That steady demand reflects ongoing work in renovation, built-ins, and interior finishing. In practice, installers use miter cut rails when appearance matters as much as strength. However, a decorative joint is not automatically a structural joint. Poor support, changing humidity, or a small angle error can cause gaps. That part deserves more attention than many guides admit.
Tips: Measure the opening twice, then test-cut scrap material. Use a sharp blade and a stable fence. Check the rail’s grain direction before cutting. For handrails or load-bearing assemblies, follow local building requirements and use mechanical reinforcement when specified.
| Common Application | How Miter Cut Rails Are Used | Typical Miter Angle | Primary Material Options | Main Benefit | Important Consideration |
|---|---|---|---|---|---|
| Cabinet Doors | Horizontal rails are joined to vertical stiles with angled cuts to create a framed door construction. | Usually 45° for corner joints | Hardwood, engineered wood, or composite materials | Creates a clean, continuous frame with an attractive corner detail. | Accurate cutting and clamping are needed to prevent gaps at the joints. |
| Picture and Display Frames | Rails are cut to form the top, bottom, and side sections of a rectangular or polygonal frame. | Commonly 45° for rectangular frames | Wood, metal, plastic, or moulded composite | Produces nearly invisible corner seams when the cuts are precise. | Matching the rail profile and grain direction helps maintain a uniform appearance. |
| Furniture Frames | Mitered rails are used in tables, benches, shelving, and other framed furniture components. | 45° is common; custom angles may be required | Solid wood, plywood, aluminum, or steel | Supports decorative corner transitions without exposed end grain on selected designs. | The joint must be reinforced when the frame will carry significant loads. |
| Architectural Trim and Moulding | Rails or trim sections are cut at angles to join around wall corners, openings, ceilings, and panels. | Often 45° for square corners; other angles for irregular layouts | Wood, MDF, PVC, polyurethane, or aluminum | Provides a continuous finished profile around architectural features. | Wall and corner irregularities should be measured before cutting. |
| Window and Door Frames | Miter cut members form visible frame corners in selected interior or lightweight frame systems. | Typically 45° for four-sided frames | Wood, aluminum, uPVC, or composite materials | Improves visual continuity and allows frame sections to meet neatly. | Weather sealing, drainage, and structural requirements may limit the use of miter joints. |
| Panel and Partition Systems | Rails are angled to create finished edges, corner returns, or framed panel assemblies. | 45° for standard corners; 30° to 60° for special layouts | Aluminum, steel, wood, or engineered board | Creates clean transitions between panels and reduces the appearance of exposed cut ends. | Check alignment across adjoining panels before permanently fastening the rails. |
| Exhibition and Interior Displays | Mitered rails are assembled into lightweight display frames, signs, stands, and decorative structures. | 45° for rectangular displays; variable for custom shapes | Aluminum, wood, acrylic, or composite board | Provides a neat, professional appearance with consistent perimeter lines. | Use suitable connectors or adhesives for repeated assembly and transport. |
| Stair and Railing Details | Selected rail sections are mitered where handrails, decorative rails, or trim members change direction. | Determined by the actual intersection angle | Hardwood, stainless steel, aluminum, or coated steel | Allows rail elements to follow corners while maintaining a continuous visual line. | Load-bearing rails require proper engineering, fastening, and compliance with local building codes. |
| Custom Metal Fabrication | Metal rails or rectangular sections are miter cut before welding to create frames, guards, carts, and supports. | Commonly 45°, but based on the required frame geometry | Carbon steel, stainless steel, or aluminum | Reduces overlapping ends and can produce strong, clean welded corners. | Account for material thickness, weld shrinkage, heat distortion, and finishing requirements. |
| Decorative Wall and Ceiling Grids | Rails are cut to meet at angled intersections in geometric panels, ceiling layouts, and feature walls. | 45°, 60°, or other angles based on the pattern | Wood, metal, PVC, or composite profiles | Supports precise geometric designs and visually consistent intersections. | A detailed cutting plan is recommended to minimize waste and maintain pattern symmetry. |
Miter cut rails support accurate angled cuts by guiding a saw along a controlled path. They help maintain the intended angle while the blade crosses timber, panels, or trim. This matters when joining frames, baseboards, and cabinet edges. A small error can create a visible gap.
A rail also stabilizes the workpiece and reduces sudden lateral movement. It does not replace a sharp blade, firm clamping, or careful measurement. The U.S. Bureau of Labor Statistics recorded 1,069 fatal work injuries in construction and extraction occupations in 2023. That figure reinforces the need for controlled cutting practices. Keep hands outside the cutting path, and inspect the rail before every use.
Accuracy depends on setup. ISO 2768-1 lists a medium tolerance of ±0.5 millimeters for dimensions from 6 to 30 millimeters. That is tighter than many casual workshop cuts. Mark the reference edge clearly. Align the rail with the waste side of the line. Check the angle with a calibrated square or digital gauge. Then make a test cut on scrap material.
Small details matter.
In practice, rails can still flex, shift, or collect dust beneath their base. I have found that repeating the measurement often exposes an unnoticed mistake. The first cut may look acceptable, yet the joint can reveal a one-degree error. That is why experienced users combine the rail with dry fitting, light pressure, and a final visual inspection.
In woodworking, miter cut rails guide a workpiece while creating clean angled joints. They are common in cabinet doors, picture frames, trim assemblies, and small furniture projects. A rail keeps the material aligned against a fence or cutting path. This reduces twisting during a 45-degree cut. It also helps produce matching corners. The result depends on more than the rail itself. A sharp blade and stable support still matter.
Key materials and design features determine how reliable a rail feels. Aluminum is light, corrosion-resistant, and easy to machine. Steel offers greater stiffness, especially for long rails or heavy stock. Hardwood can work well in a traditional jig, but moisture may cause movement. Some rails include T-slots, adjustable stops, measurement scales, or replaceable wear strips. These features improve repeatability without making the setup excessively complex. A smooth surface also limits friction and prevents scratches. However, a printed scale can drift from true alignment. Check it with a square before trusting it.
Tips: Clamp the rail firmly. Test on scrap wood. Confirm both angles. Leave clearance for the blade. Clean dust from the guide surface, because small particles can change the cut. In practical use, even a well-designed rail may need adjustment after repeated pressure. That small flaw deserves attention. Accuracy is maintained, not assumed.
Miter cut rails guide a workpiece through accurate angled cuts. They are useful for picture frames, trim, flooring, and cabinet parts. The right rail should match the tool, workpiece size, and cutting angle. A short rail may suit small moulding. Longer stock needs better support.
Measure before buying. Check the rail’s length, slot width, and fence compatibility. Aluminum rails are light and resist rust, while steel rails usually provide greater rigidity. A clear angle scale helps with repeated 22.5-, 30-, and 45-degree cuts. For busy workshops, a replaceable stop saves time. It also reduces measuring errors. Small details matter.
Safety cannot be an afterthought. The U.S. Consumer Product Safety Commission estimated about 33,400 emergency-department-treated table-saw injuries annually from 2011 to 2015, according to its Table Saw-Related Injuries report. Miter-cut rails do not remove kickback or pinch-point risks. Choose a rail that keeps hands away from the blade and holds material firmly. OSHA’s woodworking guidance also stresses guarding, stable support, and controlled feeding. I once favored the stiffest rail available. It worked, but it was awkward for narrow trim. The better choice depends on the project, not impressive specifications. Test the rail with scrap wood first. Errors become visible quickly.
Miter cut rails are used to create clean angled joints in frames, trim assemblies, enclosures, and polygonal structures. When two rails are cut at the same angle, their combined joint angle is approximately twice the individual cut angle.
A 45° cut on each rail produces the standard 90° corner used in many rectangular frames. Smaller cuts are useful for wider corners, while 60° cuts create a 120° joint suitable for triangular or hexagonal layouts. Select the rail profile and cutting angle according to the required joint geometry, material thickness, and load conditions.